Getting started with the OBS WebSocket using Node.js
Part 1: Create the Node.js app, and connect to the WebSocket


This series is a no nonsense guide to creating a simple Node.js application and using it to interact with the Open Broadcasting Software Websocket.
By the end of this article you should have a working template which you can build upon, as well as some ideas to start using the WebSocket for.
Future articles will expand on this guide by integrating with the Twitch chat and Twitch PubSub so we can use events happening on our Stream to update things on our overlay automatically.
Initial setup Node
Ill be using VS code as my IDE so assuming you have Node.js installed and have created a new directory for your project.
run npm init and enter through the initialization questions to create your blank project.
Install obs-websocket-js from this github repository using
npm install obs-websocket-js
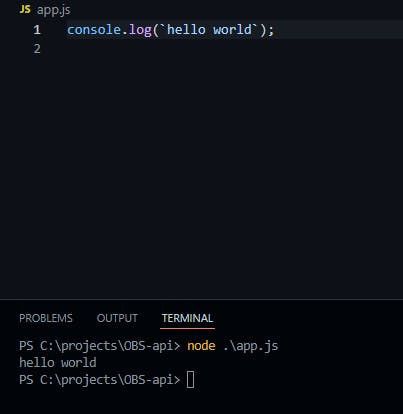
create a new file in your project directory namedapp.js This is the main file we will be using for our project
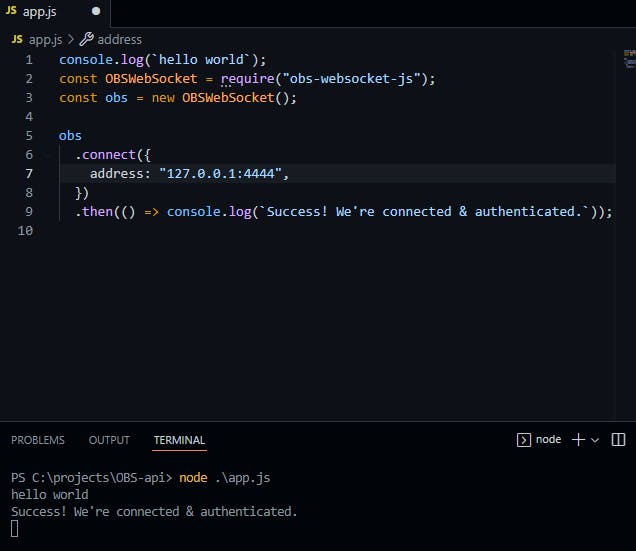
Throw in a quick console.log(`hello world`) and run node app.js just to make sure were all good so far.
Great, now lets move on to preparing OBS software to host the WebSocket server.
Initial setup OBS
Download and install the OBS WebSocket plugin from https://obsproject.com/forum/resources/obs-websocket-remote-control-obs-studio-from-websockets.466/
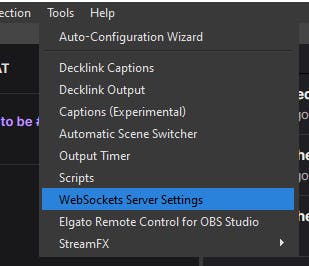
After following the installation instructions, open up OBS and you should have a "Websocket server settings" option under "Tools"
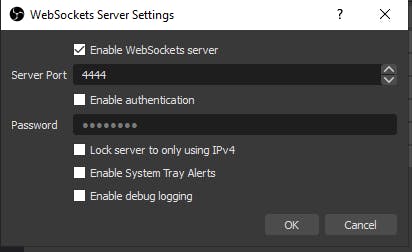
Open this up and check the "Enable WebSockets server" setting and add in a port number. Dont worry about Authentication for now.
We are now ready to connect our Node app to the OBS WebSocket server, and attempt to do some things with it.
Connecting to the WebSocket
Import the module into our app.js script by adding these two lines at the top.
const OBSWebSocket = require("obs-websocket-js");
const obs = new OBSWebSocket();
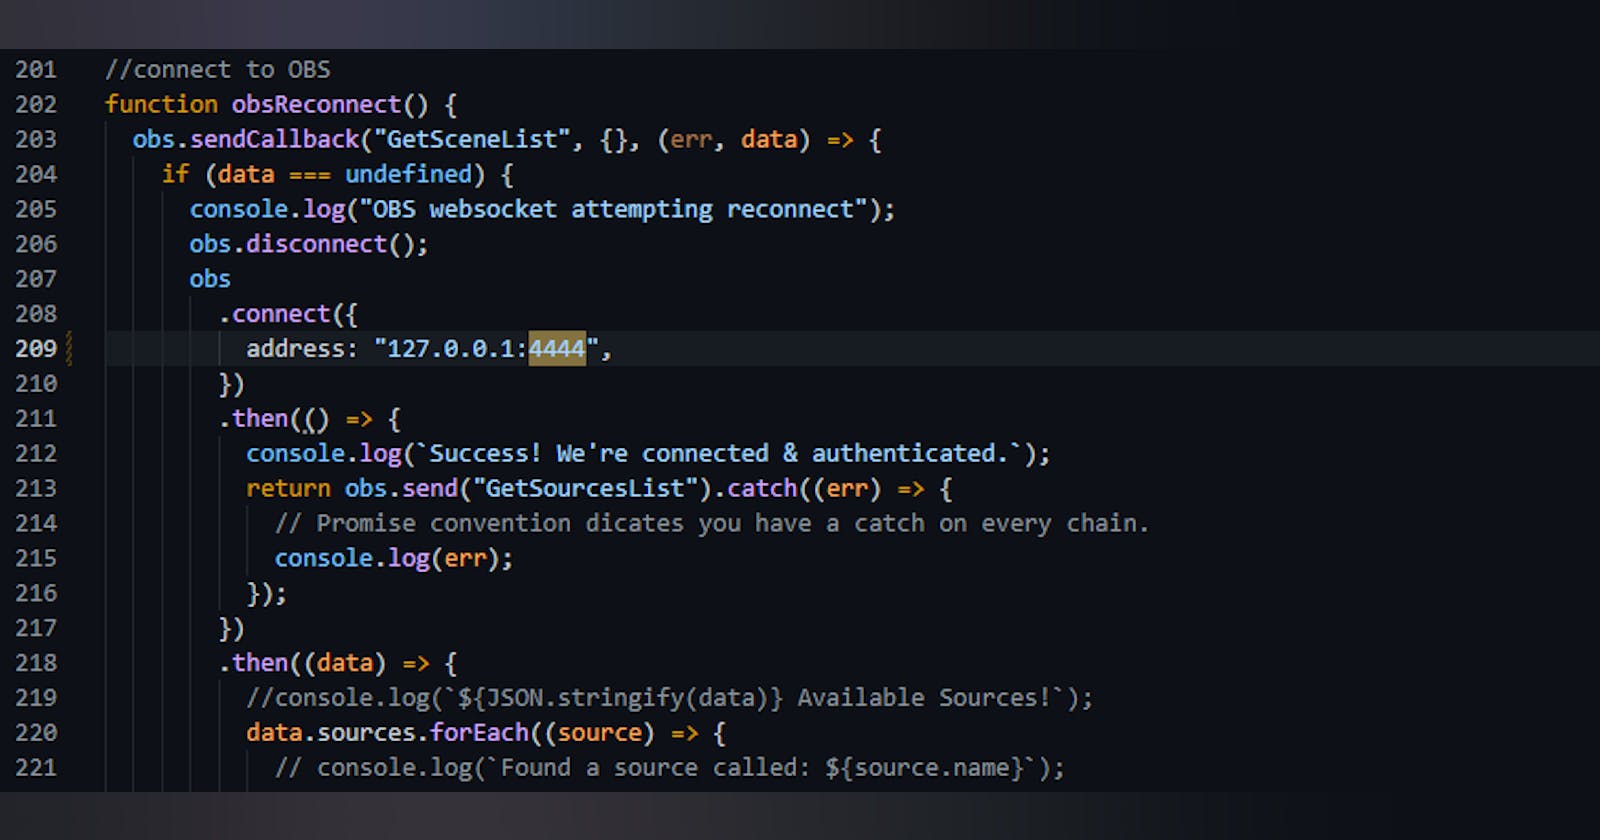
Create the WebSocket Connection like this adding in your IP address and port of the computer where OBS is running;
obs.connect({
    address: "127.0.0.1:4444",
  })
  .then(() => {
    console.log(`Success! We're connected & authenticated.`);
  });
Now run your application with node app.js
Hopefully you got a console log of "Success! We're connected & authenticated."
Great! Now for the last step of this article. we will make a simple request from the Websocket server, and take a look at the response.
Sending a request
Lets do a "GetSourcesList", and then log the data to console;
obs.connect({
    address: "127.0.0.1:4444",
  })
  .then(() => console.log(`Success! We're connected & authenticated.`))
  .then(() => obs.send("GetSourcesList"))
  .then((data) => {
    console.log(data);
  });
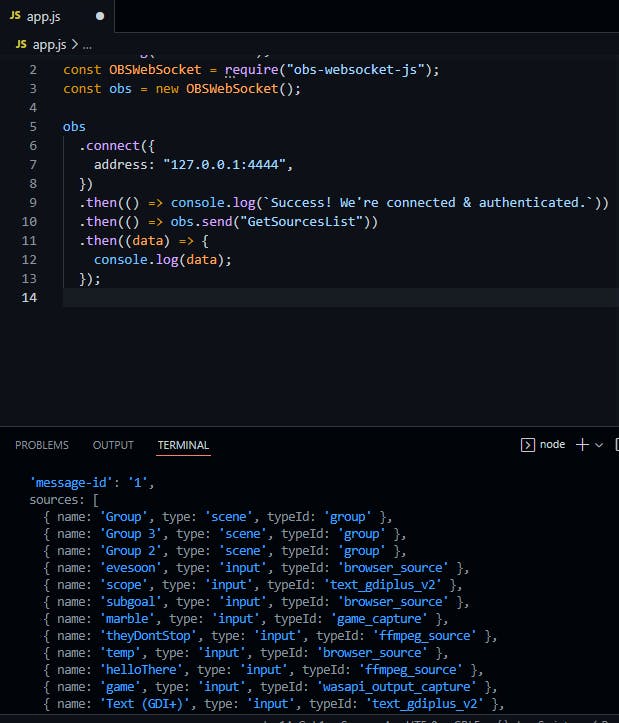
Great! My OBS WebSocket returned all the sources.
That's it for this article but be sure to follow because next time we will send some instructions to the WebSocket and make some cool things happen like;
- Show and hide sources
- Change transition effects
- Change properties of sources like size/shape/url
- Move sources around the screen